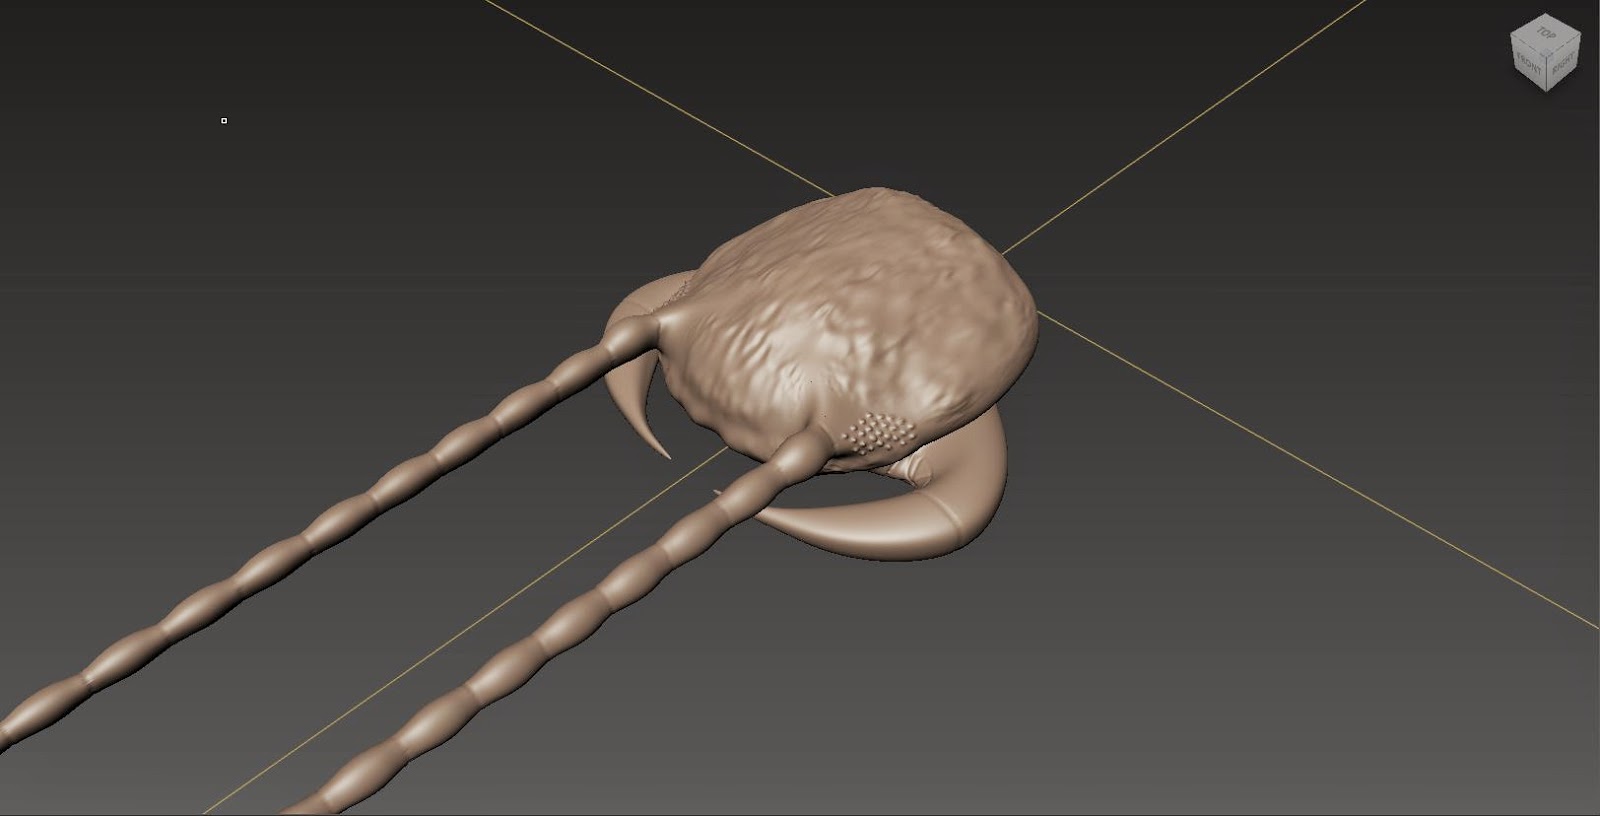
Alright so I was doing alright, taking my time painting the skin weights for the centipede when I encountered a problem and I don't even know how I caused it.
The weight map will no longer show up on my models. I click the geometry and then go to paint skin weights, but no map shows up. I select the joints to the left, as you can see, but in the view port they aren't selected. This is a very troublesome problem and I may even have to take some drastic measures to fix it, which I don't wanna have to do. Unfortunately I've been trying to Google my problem all day and I have grown exhausted from searching.
I was able to at least paint enough of the models so I can just copy the weight map of one segment to the next, but I'm not sure how that will affect the map and which joint is affecting what area, so we will see.
I had a problem for awhile where the weight map of one pincer would affect the tip of the opposing one. Even painting the weights was not helping, so I had to do something a bit more precise. I went into the component editor while selecting the affected vertices and readjusted the values of which joints affected which vertices. Now they work beautifully without moving the tip of the other side.
I added a little flaring attribute to the pincer controls which extends the pincer out even further, but only for half of it's length since there is a segment in that region. This will enable the pincers to have a more grasping appearance when animated and can even look like it's "chewing" on prey.
I have been doing more research into how I will be able to rig the leg movements when the creature walks and I have an idea as to how to do it finally. I will have to create an expression that, after keying one leg, will affect all the others in the same row a certain way. I still have to get clarification on certain areas, but one of the codes has something to do with timing and placement. Coming down to the wire here and now it is officially announced that there are 3 weeks left in the project. Guess I had more time than I thought. Next week, I'll fix this weight map problem and do some more texturing along with starting the coding process.
Friday, April 10, 2015
Friday, April 3, 2015
Week 9
Like I said last week, I've lost count as to how I am marking the weeks, but I do know I have at least 3 weeks left until I am presenting this project as a final.
Last week I said I would do more texturing for my next post. Well I lied and decided to move forward with rigging the centipede further since rigging is my main goal here. If I can get that done, then texturing is secondary. Here is what I have so far.
So I had a little problem with placing the IK (inverse kinematic) handles on the legs at first. On one side they would work, but the other side, they would wig out. Then I found out that when I had made the joints for the legs, I had used symetry to create them, which meant that when I selected the side I created, the side that was copied was selected as well. I deleted one side and mirrored over the remaining with the mirror joint option. That fixed my solution and now both columns of IKs work splendidly. I then went in and created a control curve and had the handles parented to each control respectfully.
I created an IK spline controller that would allow the body to move like a tentacle or snake, which is technically what a centipede looks like when it moves forward.
I created a rotation control for the head. It's not perfected yet, but the basic function works. I had a little trouble because I had a "double transformer" (I hope that's what it is called) that would cause the skeleton of the antennae to over exaggerate on the rotation. I figured out that the spline curves were grouped under the head rotation. Once I removed them, everything rotated normally.
The back legs on the tail end I decided to have a sideways bend. It's an optional thing, some centipedes have sideways rear legs, others have legs at an angle, and a few even have some that curl downward.
After all is said and done, I eventually would have had to go in and rename everything. I've gone through everything twice, if not three times. The first time renaming things, and the second or third time changing the name to something that would be easier to understand
Next week I'm going to be perfecting the rigging controls and create some attributes for certain areas. Here's to another week. I need a beer...
Last week I said I would do more texturing for my next post. Well I lied and decided to move forward with rigging the centipede further since rigging is my main goal here. If I can get that done, then texturing is secondary. Here is what I have so far.
Antennae are essentially the same thing.
I also added rotation controls for the pincers. These are also not completely done, because I'm gonna add an attribute that allows them to flare out a bit more.
After all is said and done, I eventually would have had to go in and rename everything. I've gone through everything twice, if not three times. The first time renaming things, and the second or third time changing the name to something that would be easier to understand
Next week I'm going to be perfecting the rigging controls and create some attributes for certain areas. Here's to another week. I need a beer...
Friday, March 27, 2015
Week 8
Wrong... People, when you subdivide in mudbox, apparently there are some special settings in the subdivision section you have to check so your UVs don't screw you over. You may even have to start over if it's bad enough.
Fortunately for me, I was able to fix, (or at least hide) the problem and now look at that amount of detail? This is a render close up of where my main problem was and it looks great! May have to make a few texture changes because I painted on an incandescence layer in mudbox.
See, I have these magma cracks on the pincers which I really think came out well, but their appearance is over written by the incandescence. So I'll have to go back and tone it down a bit.
So this is going to be the basic theme of my centipede's texture. It's sad to hear that mudbox is on it's way out, because it's an amazing tool and I really enjoy using it, even with all of its quirks. Anyways, gotta smooth out some other texturing issues (mainly how lighting affects it) But we'll be moving onto the bodies next week!
Friday, March 13, 2015
Week 7
Alright, Week 7. I had plans this week, but due to some unfortunate circumstances, I have fallen ill. I was not able to do much but I was given the go ahead to give my centipede a skeleton.
As you can see here, I have a lot of joints which will prove the task of rigging this creature somewhat daunting. But I have faith that my choice of locations and my plans in the future will be fruitful.
The antennae have numerous joints because when they move, they don't flick and wave around like most insects, they squirm and writhe like worms.
I placed the root join just behind the head and placed a node in the middle that will branch off into the numerous joints that connect the antennae and pincers (in case there are problems with weight mapping in the future.) I have also decided that each joint affecting a segment will actually be at it's rear so that there is a more realistic side to side and up and down movement because if they were in the middle, then the segments themselves would bend which would look ugly. In the legs, each joint is between the two creased edges connecting each leg segment and an end joint at each tip, just to move them along.
Last is the rear end which is somewhat similar to the head where I just added a node that would split off the leg joints so that there wont be any issues later on.
This week was not very productive with me getting sick, coming back from GDC, and next week being spring break. I had already done some coloring, but I'm not proud of what I did so I am starting over. I had originally decided on the colorful insect appearance in the numerous pictures I've posted in this blog series, but I think I'd rather create something more inventive and give it a sort of volcanic rock material for it's carapace. I'll see what I can do once I'm feeling better. Have a good spring break!
I placed the root join just behind the head and placed a node in the middle that will branch off into the numerous joints that connect the antennae and pincers (in case there are problems with weight mapping in the future.) I have also decided that each joint affecting a segment will actually be at it's rear so that there is a more realistic side to side and up and down movement because if they were in the middle, then the segments themselves would bend which would look ugly. In the legs, each joint is between the two creased edges connecting each leg segment and an end joint at each tip, just to move them along.
This week was not very productive with me getting sick, coming back from GDC, and next week being spring break. I had already done some coloring, but I'm not proud of what I did so I am starting over. I had originally decided on the colorful insect appearance in the numerous pictures I've posted in this blog series, but I think I'd rather create something more inventive and give it a sort of volcanic rock material for it's carapace. I'll see what I can do once I'm feeling better. Have a good spring break!
Friday, March 6, 2015
Week 6
Hey there!
So this week was a little different because I was attending San Francisco's GDC (Game Developers' Conference). I was fortunate to learn a lot while attending summits, tutorials, and boot camps. I saw a former UFC fighter, now lead animator for EA Sports put his co-speaker in a sleeper hold just to give the audience an example of how his animations would look (since his higher ups censored the animations in his power point when he wasn't looking.) Anyways, it was a wonderful experience and I believe it was worth paying for the pass. I will have updates for my work up next week which will include texturing and coloring!
Friday, February 27, 2015
Week 5
Another week and more work done. This week is a continuation of the sculpting of the Centipede. Going in, I added more details to each of the segments, giving them all a "personality".
Here is the battered segment with which I decided to do even more damage. Scars, cracks, and marks really helped it look battered.
Here I added more ripples to the smooth and untouched segment, making it look brand new and what not and more realistically undamaged.
Here is the one that has more texture and noise than the other two, making it more robust. This one may be applied more to the middle segments due to their size.
Next is the Head which required a few things for me to fix before I really got into sculpting it out.
First of all, the antennae needed to be retopologized to not only allow better animation, but also a better look. Ech of the segments of faces needs to be a bulge that will bend at the edges connecting it to the next segment, because the centipede's antannae are not a long flimsy strand, it's a bunch of beaded segments that move and coil and squirm. (Kind of creepy when you watch it actually)
Also, the pincers needed to be enlarged and given a nice beef in thickness to allow for certain details in sculpting to be closer to the references. Also the ones I had looked like they were made of ceramic just from the shape; weak and brittle.
So I started texturing the head and I felt that I had been trying to match it too closely to the images I was referencing. I decided I needed to give it some more of my own individual preference. Where the head would be more smooth, I wanted it to look rocky or still somewhat battered. What if I wanted to use this centipede as a giant creature? I want to give it more personality!
The Pincers I wanted to be smooth, but before I could do that, I had to check out how it connected to te head. It wasn't like a segment, it was more like a spiderweb of joints that formed at the curve. The eyes are compound and vary from a bunch of bumps to a honeycomb sphere. For my purpose I wanted that bumpy look. More subtle than an actual large orb of discoloration.
So down there is a little mouth section. At first I was against adding any more parts to the main model and I stand by that. But it wouldn't hurt to have two little seperate geos that will act as moving mouth parts. Fortunately I can keep those large mounds as containers that surround the parts.
So here is the textured head. I may go in and touch up some areas, but next week is mainly going to be about coloration. I'll have more free will there, but I have a general idea of how I'm going to color this thing. But I won't mention anything, it'll be a surprise!
Here is the battered segment with which I decided to do even more damage. Scars, cracks, and marks really helped it look battered.
Here I added more ripples to the smooth and untouched segment, making it look brand new and what not and more realistically undamaged.
Here is the one that has more texture and noise than the other two, making it more robust. This one may be applied more to the middle segments due to their size.
Next is the Head which required a few things for me to fix before I really got into sculpting it out.
First of all, the antennae needed to be retopologized to not only allow better animation, but also a better look. Ech of the segments of faces needs to be a bulge that will bend at the edges connecting it to the next segment, because the centipede's antannae are not a long flimsy strand, it's a bunch of beaded segments that move and coil and squirm. (Kind of creepy when you watch it actually)
So I started texturing the head and I felt that I had been trying to match it too closely to the images I was referencing. I decided I needed to give it some more of my own individual preference. Where the head would be more smooth, I wanted it to look rocky or still somewhat battered. What if I wanted to use this centipede as a giant creature? I want to give it more personality!
The Pincers I wanted to be smooth, but before I could do that, I had to check out how it connected to te head. It wasn't like a segment, it was more like a spiderweb of joints that formed at the curve. The eyes are compound and vary from a bunch of bumps to a honeycomb sphere. For my purpose I wanted that bumpy look. More subtle than an actual large orb of discoloration.
So down there is a little mouth section. At first I was against adding any more parts to the main model and I stand by that. But it wouldn't hurt to have two little seperate geos that will act as moving mouth parts. Fortunately I can keep those large mounds as containers that surround the parts.
So here is the textured head. I may go in and touch up some areas, but next week is mainly going to be about coloration. I'll have more free will there, but I have a general idea of how I'm going to color this thing. But I won't mention anything, it'll be a surprise!
Friday, February 20, 2015
Week 4
Alright! This week I focused mainly on sculpting out some texture for the centipede. I had a presentation last week and I got a lot of great advice as to how I should progress. First of all, it was brought to my attention that not every segment is the same in size. In fact the size seems to increase near the middle of the body. So I went in with a latice deformer and stretched it out. I considered where the middle segments may be taller along the y axis as well, but looking at photos of large centipedes, it really isn't that much of a change, if any at all.
Last I have this week is the tail portion, which got the same treatment as the segments; wrinkly sides and a rough top with uneven divets in the leg segments and grooves between each leg portion. The only noticeable difference are those awesome spikes I made by pulling at the mesh. The hind legs of the centipede are the second strongest pair of legs on its body. They actually use them when wrapping around large pray and gripping them. Though these spikes do not add to this function, they are a gnarly addition and give it a more fearsome appearance.
As I said before, it seems sculpting will be pushed into next week as well, because the head isn't done yet and the other parts need some more details in my opinion. It was tedious to try and get the right look, but I know I am very close. I have talked to my professors about changing my planned schedule, letting them know that texturing will have to wait another week and that sculpting will go on for another. But I think that's alright. Every business hit's a snag occasionally when it comes to personal goals. What matters is if you meet the main due date when you're supposed to have the product shipped to the customer. So as long as I do that, this little change in plans is nothing to worry about.
Subscribe to:
Posts (Atom)